- Home
- Building Advice
- Common problems
- How to make lime mortar repairs
How to make lime mortar repairs
Overview
Overview
The best approach to making repairs is often to use the same materials and methods as were used for the original construction. Lime mortar will be required in most cases for the repair of traditional buildings.
Selecting an appropriate repair mortar can be a complex process. Specification of lime mortars involves considering factors such as:
- the purpose of the mortar
- existing materials
- climate and exposure
- stone type
- available skills
Lime mortar repairs may fail where good site practice is lacking. All aspects are important, from storage of materials to application and aftercare.
Careful preparation of both masonry and mortar mix will help to prevent the failure of lime mortar repairs.
Most lime mortars used today are prepared as cold mixes due to the ready availability of bagged limes. Traditionally, however, most mortars used were hot-mixed lime mortars, and some specialists still use these now.
Different tools and techniques are used for applying lime mortar depending on its end use.
Some simple aftercare will help to ensure the success of lime mortar repairs.
Update your personalised ad preferences to view content
- Next
-
Specification of lime mortars
Specification of lime mortars
Specification of lime mortars
Often the best approach to making repairs is to use the same materials and methods as were used for the original construction. Lime mortar will be required in most cases for the repair of traditional buildings.
Selecting an appropriate repair mortar can be a complex process. Lime mortar composition can vary greatly, and you must consider a number of issues to be able to identify the most appropriate mix.
Involving an experienced buildings consultant or stonemason at this stage can be a sound investment. Correct specification of lime mortar and its application will ensure better performance and prevent avoidable masonry decay, saving on future maintenance and repair costs.
Mortar purpose
Understanding what will be required of a mortar once it’s in place is important in deciding upon its desired properties. Several different specifications may be needed if mortar repairs are being carried out across several areas of a building.
Bedding mortars act mainly as a cushion to support and spread the load of the masonry units. Holding the masonry blocks together is a secondary purpose.
Some mortars, particularly those for use on skews and chimneys, should be resistant to frost and repeated wetting and drying cycles, and therefore stronger than point mixes.
Mortars for rendering or harling should usually be highly breathable, to deal with the diffusion of the often large amounts of moisture to which they’re exposed.
Existing materials
Old and new materials must be compatible. Choosing an unsuitable repair material can result not only in the failure of the repair, but also speed up the decay of the adjacent materials.
Repair mortars should have equal or higher water absorption and vapour permeability values than the adjacent masonry to prevent problems linked to inhibited moisture diffusion. Lime manufacturers can often supply technical data on such qualities.
Climate and exposure
The location of both the building and the repair site on it will affect how much the mortar is exposed to rainfall, wind and frost. Very exposed areas or parts of the building that stay wet (e.g. chimneys and parapets) will call for a stronger hydraulic mix than a sheltered area would require.
Aftercare of lime mortar will also be important to protect it from either rapid drying or frost damage.
Stone types
High-strength mortars shouldn’t be used to repoint or repair sandstones and limestones, which are relatively soft and porous.
Impermeable stone types can’t get rid of moisture. Using a permeable and breathable mortar will prevent any potential build up of moisture within the wall that could lead to internal damp.
Available skills
Lime isn’t a difficult material to handle, and any trained mason or bricklayer should be able to work with lime mortar. It may not always be possible, however, to find someone locally who is familiar with using lime mortar and with its properties.
If batching up mortar yourself, try it out on some sample areas on part of the building that's not easily seen. This will give you a chance to get familiar with batching and application techniques. Trial panels are also useful if your contractor needs to confirm a mix and how it will look.
- Previous
-
Overview
- Next
-
Site practice
Site practice
Site practice
Lime mortar repairs may fail where good site practice is lacking. All aspects are important, from storage of materials to application and aftercare.
Safety issues
Lime is a highly caustic product and can be irritating to eyes and skin. Slaking of quicklime and mixing of dry powdered lime should be carried out in a well-ventilated area. Hot mixing is a further building site risk as temperatures can reach 300ºC. Personal protective equipment – gloves, breathing apparatus/masks and goggles – must be worn for all work involving lime.
Storage of materials
Raw materials that aren’t stored properly may degrade, causing the lime mortar to fail. Correct storage of both binders and aggregates is essential.
Quicklime should be stored in dry tubs and protected from moisture, to prevent it from slaking. To test if lime is still useable, pour water on a small piece. If the lime reacts, producing steam and breaking down to form a powder, you can still use it.
Dry bagged lime should be kept in a dry, ventilated area protected from rain, frost and dew. Opened bags should be carefully sealed shut. Rain and moisture in the air will cause the onset of air hydration and/or carbonation. Lime that appears lumpy must not be used.
Lime putty should be stored in tubs covered by a layer of water to prevent drying and carbonation. Lime putty improves as it ages, becoming more workable, and can be stored indefinitely in the correct conditions.
Sand should always be stored on a ground sheet to prevent contamination from groundwater salts and organic material. Covering the sand with tarpaulin protects it from the weather and from other contaminants and debris. Sand may increase greatly in volume when wet, and this must be factored into measurements to avoid batching errors.
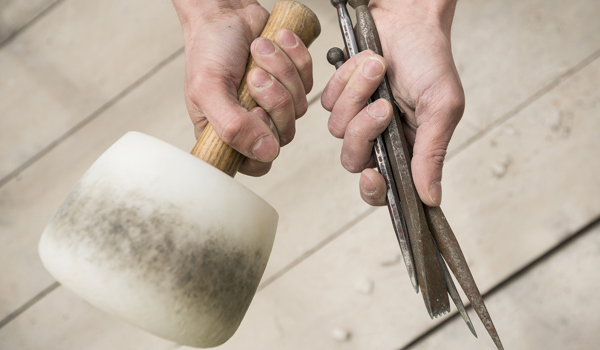
Tools for removing pointing
The correct tool must be chosen for each task to avoid damaging masonry. For example, the right size of tool to use for raking out (or for pointing or tamping) is based on the width of the joint. A chisel may be suitable for scraping out soft mortar in wide joints, but fine ashlar joints demand a fine scraping tool or blade.
Hand tools were traditionally used to carry our work, but the use of power tools for removing old pointing is becoming more common. Used carefully and only where appropriate, some power tools can speed up work or improve accuracy.
Conventional rotating disc cutters must never be used, however, as these are difficult to control and can very easily damage the stone.
Tools for lime pointing
Using appropriate methods to prepare and apply lime mortar is also vital in ensuring the success of repairs.
Useful tools include:
- gauging trowel – for applying mortar to wide joints
- pointing key – for fine joints
- bristle brush – to brush down stone prior to work
- plaster's hawk – to hold the mortar for the trowel
- mash hammer – to break up stones for pinnings
- Previous
-
Specification of lime mortars
- Next
-
Preparing lime mortar
Preparing lime mortar
Preparing lime mortar
Preparing both the masonry and the mortar mix correctly is essential to prevent the failure of lime mortar repairs.
Preparing the masonry
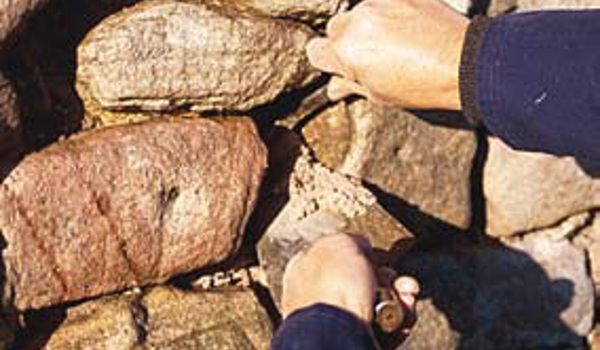
- Remove existing mortar that’s decayed, damaged or has been wrongly applied. When repointing, existing pointing should be raked out to at least twice the width of the joint. Leave in place any sound lime mortar or cement mortar that will cause major damage to masonry if removed.
- Brush down joints and then wash out with water to remove all dirt, dust and debris. Joints must be clean for the mortar to stick properly.
- Dampen down masonry (only if a porous stone) to prevent the rapid drying of mortar. The wall should be damp but not saturated.
Now is also a good time to address issues relating to stone decay or damage. Where required, stone repair and/or replacement should be carried out alongside repointing works.
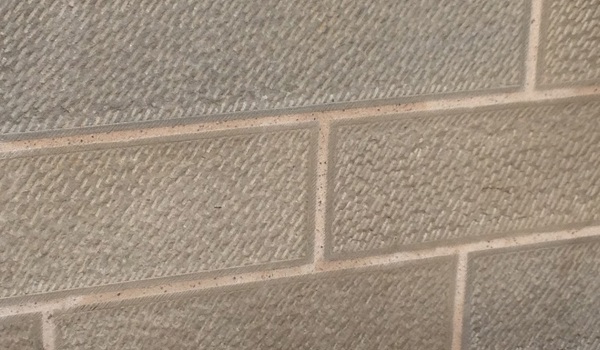
Read more about raking out ashlar masonry.
Learn more about raking out rubble masonry.
Find out about deciding to repair erosion of sandstone.
Preparing the mortar mix
Below are some general principles to follow when making the mortar mix. You should also take into account any specific manufacturer’s guidance.
Weigh bagged lime using a set of site scales, or measure it out by the full or half bag (weight) to ensure correct quantities. Measuring by volume can be inaccurate.
Use sand that’s been washed and is free from contaminants. Damp sand and dry sand have different bulking values: adjust the sand and water content of the mix to account for moisture in the sand if it’s been exposed to rain.
Only use clean, potable water to avoid adding groundwater salts and/or other contaminants to the mix. Add water cautiously – starting with the minimum amount. A lime mortar should be stiffer and stickier for repointing hard, impermeable stone, and more workable for more porous stone. Adding too much water can cause the mortar to shrink and crack.
Allow for adequate mixing time – mortars will become more plastic and wet as they are mixed. A forced action mixer ensures a more consistent mixing of the mortar, although some lime binders may be mixed with a bell mixer. Lime mortars may also be mixed by hand in a wheelbarrow or on a flat board. Check the manufacturer’s guidance for best practice.
Don’t try to mix mortar, or apply it without suitable protection, in:
- very cold conditions (below 5ºC)
- direct sunlight
- strong winds
- heavy rain
Failing to protect the mortar from these conditions can result in excessive drying and incomplete carbonation. Temperatures below 5ºC will inhibit carbonation and make the mortar more prone to frost damage. In winter, lime works should be covered to protect the mortar from frost and rain. Lime mortars should be cured and dry before frost protection is removed.
- Previous
-
Site practice
- Next
-
Cold vs hot-mixed lime mortars
Cold vs hot-mixed lime mortars
Cold vs hot-mixed lime mortars
Most lime mortars used today are prepared as cold mixes due to the ready availability of bagged limes. Traditionally, however, most mortars used were hot-mixed lime mortars, and some specialists still use these now.
Cold-mixed lime mortars
Dry aggregate and powdered lime should be thoroughly mixed together before adding water to ensure an even consistency of the mix.
Leaving the mortar to stand for several hours allows it to ‘fatten up’ (become more workable). But the ability to do this largely depends on the hydraulicity of the lime, as hydraulic limes begin to set fairly quickly.
When using lime putty, it is mixed with dry aggregate in the right proportions to produce coarse stuff or fine stuff (depending on aggregate size). Lime putty contains enough water to produce a good mortar without adding extra water. Plasticity will return when lime putty mortar that’s been left a while is re-mixed.
Read general principles for preparing the mortar mix.
Hot-mixed lime mortars
Lime mortars were traditionally ‘hot mixed’, so called because the mortar is made with quicklime, which generates heat as it reacts with water. This process, called slaking, improves the adhesive properties of the mortar.
Hot-mixed lime mortars are either:
- hot lime – used while still hot
- hot slaked lime – allowed to cool and then re-mixed before being applied in the same way as a cold-mixed mortar
Hot lime mixes can be used for all applications but are particularly good to use when repointing hard, impermeable stones in exposed conditions. The hot (or warm) mortar continues to expand a little once applied, ensuring a tight and compact yet permeable joint. Any free moisture in the masonry is bound into the lime mortar as it slakes, instead of being trapped in the building.
Hot slaked lime mixes can be used for all types of lime work including bedding, pointing and harling.
- Previous
-
Preparing lime mortar
- Next
-
Re-mixing lime mortar
Re-mixing lime mortar
Re-mixing lime mortar
‘Knocking up’ is the term given to the re-mixing of a mortar that has been left to mature and might have become hard overnight.
Mortar that matures in storage will stiffen up and can appear firm and solid. But a lime mortar will regain its plasticity as it’s re-mixed, as the water within it is released.
Don’t add extra water until after the mortar has been re-mixed – even then, none may be needed. Mortar that’s too wet is at greater risk of shrinkage, cracking and failure.
Quicklime mixes can be knocked up even after several weeks, but you can only successfully re-mix natural hydraulic limes within certain time limits. If left for longer, a weaker mortar with lower adhesion will result. Typical times are 24 hours for NHL 2 and NHL 3.5 mortars, and 16 hours for NHL 5 mortars.
- Previous
-
Cold vs hot-mixed lime mortars
- Next
-
Applying lime mortar
Applying lime mortar
Applying lime mortar
Mortars used for different functions not only require different specifications and preparations but are often applied using different tools and techniques.
Find out how to repoint ashlar masonry.
- Previous
-
Re-mixing lime mortar
- Next
-
Aftercare of lime mortar
Aftercare of lime mortar
Aftercare of lime mortar
Poor aftercare is often the cause of lime mortar failures. Lime mortars need more aftercare and attention than cement mortars, but you can get good results by following these simple steps.
Promote carbonation
After applying pointing, and once it has begun to set, press or scrape back the mortar with a trowel or stiff brush to create an open texture and promote carbonation. Don’t repeatedly work it, however, as this can weaken the mortar below the surface.
Prevent rapid drying of mortar
Cover the masonry with damp hessian or plastic sheeting in warm and/or windy conditions to protect the mortar as it cures.
Hydraulic mortars must be kept damp for several days to ensure the onset of hydration reactions.
Air limes should undergo a number of dampening/partial drying cycles to promote carbonation. In warm weather, most quicklimes take an initial set after a few hours, and a partial cure after 24 to 48 hours. Two or three wetting cycles will usually be needed.
Protect from rain
Protect the repairs from rain, which may wash out the lime or cause bloom on its surface. This is unsightly and will hinder carbonation and weaken the mortar.
Winter working
A number of extra measures are needed to protect the mortar from frost.
Protection options include:
- protected scaffold to keep the rain off
- covering masonry with layers of hessian, bubble wrap or other insulating material
- re-wetting mortar that has dried out excessively in cold weather
You must maintain ventilation to allow carbonation if covering masonry with insulating material.
Waiting period
Allow for an initial set of the mortar before applying render or surface finishes such as lime paint or limewash. And allow each coat of render or limewash to take a set before applying another. This may take from a few hours up to a day. Allowing a full cure between render or lime layers isn't recommended.
- Previous
-
Applying lime mortar
Related to How to make lime mortar repairs

Hiring a contractor
Get advice on hiring a contractor including choosing a contractor and managing the work.


