- Home
- Building Advice
- Common problems
- How to insulate stone walls
How to insulate stone walls
Overview
Overview
Well cared for buildings are far more energy efficient. So it’s best to make sure you’re maintaining your property well before thinking about adding insulation or making other improvements.
Where to insulate first is worth some serious thought. Insulating the walls should be last on your list, as other measures are often cheaper and easier yet also effective in improving a building’s energy efficiency.
If you decide to insulate your walls, there are a number of wall insulation options, some of which may be suitable for your property:
- Original or highly decorated internal walls are often best treated by blowing insulation behind the wall lining.
- If it’s not possible to insulate behind original lath and plaster walls, one option is to apply insulation onto the existing wall linings.
- Where a wall was originally plastered ‘on the hard’ (directly onto the masonry), you can apply insulation directly onto the plaster surface.
- Where original lath and plaster wall linings are damaged or have been removed, there may be space to hold insulation in place with framing.
- External wall insulation may be suitable for a harled or rendered building if the finish is failing.
Traditional stone buildings need to be able to absorb and release moisture to prevent decay of the building fabric. Whichever insulation option you choose, it mustn’t interfere with this process.
Ventilation is also necessary in traditional buildings, and a balance needs to be struck between air circulation and warmth.
Update your personalised ad preferences to view content
- Next
-
Maintaining your property
Maintaining your property
Maintaining your property
Well cared for buildings are far more energy efficient. In fact, maintaining and repairing your building is probably the single most important thing you can do to improve its energy performance.
So it’s best to make sure your building is in good shape before thinking about adding insulation or making other improvements.
Heat loss problem areas
Loose or defective pointing, poorly maintained windows and damp masonry all reduce the thermal performance of the building fabric. Heat loss and energy costs will both increase as a result.
Gaps around doors, windows or floorboards let heat escape and cause draughts, affecting your comfort.
Building defects that cause masonry to become wet or prevent moisture from escaping the building fabric will both:
- make your property feel colder
- cause the affected wall to perform less efficiently – heat is lost more rapidly through wet material
Adding insulation without first fixing such problems could make the situation worse by trapping in more moisture. Damp problems and other defects can also stop insulation from performing at its best.
Find out about looking after your:
- Previous
-
Overview
- Next
-
Where to insulate first
Where to insulate first
Where to insulate first
Insulating the walls should be last on your list when trying to improve the energy efficiency of a traditional building.
Other measures are often cheaper and easier, for example, insulating and draught proofing windows and doors, and insulating roofs and floors.
Windows
Traditional single glazing isn’t a good insulator. But there are many ways to improve the thermal performance of a window – and without negatively affecting its fabric or appearance.
You can improve thermal performance of windows by:
- draught proofing sashes – to reduce air leakage by up to 80%
- drawing full length, lined and well-fitted curtains – to control draughts and reduce heat loss by up to 14%
- closing timber shutters – to reduce heat loss by up to 51%
- applying a thin layer of aerogel blanket to insulate shutters – to reduce heat loss by up to 60%
- using a mixture of blinds, curtains and shutters – to reduce heat loss by as much as 62%
- adding secondary glazing – to reduce heat loss by up to 63%
- adding secondary glazing and using other measures like blinds and shutters – to reduce heat loss by more than 75%
- fitting double glazed panes into the existing sashes
A timber sash and case window in good condition will have very little air leakage and shouldn’t need draught proofing. In fact, this source of ventilation is good for the building.
Find out more about how to repair and upgrade sash windows.
Doors
Heat loss from doors can be much reduced by:
- draught proofing the door edges, letterbox and keyholes
- fitting insulation to the inside of the door panels
- Timber door frames perform well thermally, but panels are often made of thinner wood.
To fit insulation to door panels:
- Choose insulation that allows vapour permeability and is thin enough not to greatly alter how the door looks.
- Fit the material using an adhesive (not nails or screws).
- Apply a thin layer of plywood on top.
- Fix in place new beads or moulding in the original style.
- Paint the door.
Roofs
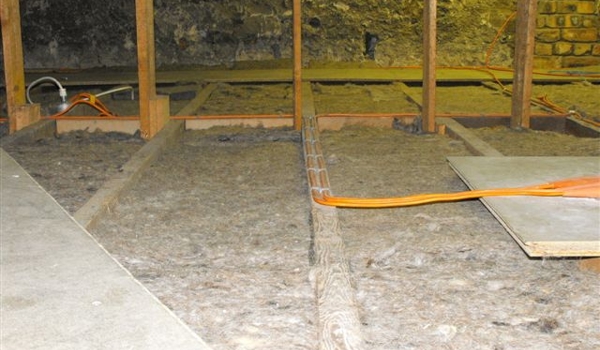
Around 25% of heat is lost through the roof of a building, so loft insulation is a popular and effective way to reduce heat loss.
Insulation can be fitted either:
- at ceiling level, which creates a cold roof space
- between the rafters, for a warmer roof space
Standard loft insulation involves fitting the material on the horizontal upper side of the ceiling in a loft, rather than between the rafters.
You should fit at least 270mm of your chosen insulation for it to be fully effective. The loft access hatch should also be insulated and draught proofed. Roof space ventilation must be checked and increased if condensation is thought to be a risk.
Floors
A cold floor absorbs heat, while cold air will enter a room from below wooden floorboards.
Timber floor insulation works best when fitted below the floorboards. You won’t need to disturb the floorboards if you can access the floor below via a crawl space. Where there's no crawl space, you can lift the floorboards to fit wood fibre board between the floor joists.
Solid floors can also be insulated, but don’t risk damage to original solid floors such as flagstones by lifting them just to lay insulation. If the floor must be lifted for another reason, or you have a modern concrete floor, insulation can be a good idea. Insulated board can be laid on top of the existing floor or a new insulated lime concrete floor can be laid in its place.
- Previous
-
Maintaining your property
- Next
-
Wall insulation options
Wall insulation options
Wall insulation options
Modest changes to the internal surface of masonry walls can really improve their thermal performance.
Some such insulation methods:
- are in line with good conservation practice
- cost relatively little
- cause minimal disruption to occupants
- allow existing internal linings and finishes to be kept
Traditional mass masonry walls let moisture vapour move through the fabric. Any insulation – and any finishing applied over it – mustn't hinder this. Creating a vapour barrier could lead to moisture build-up and masonry decay.
It’s important to consider the location and exposure of a building when thinking about insulating walls. For example, it may be better not to treat walls that are very exposed to wind driven rain but to invest instead in external detailing improvements to better manage this issue.
Internal upgrade options
Internal insulation can be either:
- blown behind existing wall linings
- applied on existing wall linings
- applied directly to masonry or plaster
- held in place by timber framing
The method you choose will largely depend on the extent of any original fabric and its condition.
Where lath and plaster survives, there is normally a cavity between this and the masonry wall.
Where original linings have been lost, more recent dry linings can be removed and replaced with insulation. This can either be applied ‘on the hard’ (directly to the masonry) or the wall can be framed with timber to hold insulation in place. Thinner materials such as calcium silicate based insulation board and aerogel based blanket are best applied directly to the masonry. Thicker materials, like fibreboard and hemp board, are best held in place with framing.
Thermal or cold bridges should be avoided as far as possible when insulating a wall. These are formed at the meeting point of surfaces that lose heat at different rates, and can lead to condensation and possible decay.
Suitability for external wall insulation
Insulating material can rarely be applied to the external face of masonry. This may be appropriate, for example, if the render or harling on a building has failed.
External wall insulation is unlikely to suit many traditional buildings, as its use would obscure high quality ashlar work or an attractive façade. It can also be difficult to detail external insulation, e.g. at window and door openings.
- Previous
-
Where to insulate first
- Next
-
Insulating behind lath and plaster walls
Insulating behind lath and plaster walls
Insulating behind lath and plaster walls
Original or highly decorated internal walls are often best treated by blowing insulation behind the wall lining.
Using blown materials to improve the thermal performance of lath and plaster wall finishes is a similar idea to cavity wall insulation. Existing linings can be kept, and disruption to both historic material and the occupants is minimal.
Suitable insulating materials may include:
- blown cellulose
- polystyrene bead (but breaks down when used near to electrical wiring)
- perlite
- water based foam
How much thermal performance improves will vary greatly depending on the material used and the depth of the void between the masonry and wall lining.
The wall to be insulated must be dry and able to stay dry. External maintenance is vital in ensuring water vapour permeability.
Associated risks
This method greatly reduces the ventilation of the cavity between the lath and plaster and the masonry wall. So it’s vital that a vapour permeable – ideally, open cell – material is used to allow some movement of air and water vapour yet still prevent draughts.
Water vapour permeability may also be reduced by:
- external finishes such as cement render
- textured wallpapers
- vinyl paint finishes
Installation process
- Remove skirtings and pack gaps in the base of the wall with wood wool or rough hemp fibre to stop material falling down into voids below.
- Make holes in the plaster at 1m intervals up the wall to allow the blower nozzle access to the void.
- Blow in insulation material from gradually higher levels until the ceiling is reached.
- Use a thermal imaging camera or a borescope to check that the insulating material has filled all the voids.
- Fill any missed areas – and the access holes.
- To redecorate, apply lining paper with a water based paste and then use a traditional distemper, clay or mineral paint or other permeable finish.
- Previous
-
Wall insulation options
- Next
-
Applying insulation onto lath and plaster walls
Applying insulation onto lath and plaster walls
Applying insulation onto lath and plaster walls
If it’s not possible to insulate behind original lath and plaster walls, one option is to apply a thin layer of insulation onto the existing wall linings.
New, high-performing aerogel products may be the most suitable option. These can be applied on top of lath and plaster linings to improve thermal performance – yet allow the air gap behind the plaster to function the same as before. This is especially useful where the wetting cycle of the wall is of concern, such as in an exposed location.
Aerogel-based insulation comes as either:
- board
- blanket – supplied as a roll, in 5mm or 10mm thicknesses
Various other thin insulation products have been available for some years, but these have been used mainly to control condensation in modern buildings.
Fitting aerogel blanket
- Fix the blanket to the existing wall finish with an expanded steel mesh.
- Apply two coats of plaster to the mesh.
- Use a permeable paint finish to redecorate.
With a total thickness of 25mm, this measure won’t significantly affect room proportions, cornicing or other finishing details.
Aerogel blanket also has the advantage that it can be used on curved surfaces.
- Previous
-
Insulating behind lath and plaster walls
- Next
-
Applying insulation onto internal masonry
Applying insulation onto internal masonry
Applying insulation onto internal masonry
Where a wall was originally plastered ‘on the hard’ (directly onto the masonry), you can insulate directly onto the existing plaster surface. This minimises the impact on both the room proportions and facings.
Suitable insulating materials may include:
- calcium silicate board – available in a range of thicknesses
- wood fibre based products
- new techniques such as insulated lime plaster
Fitting calcium silicate board
- Strip existing wallpaper and paint from the masonry.
- Apply a vapour permeable adhesive to the wall and fit the insulated panels in place.
- Apply two coats of plaster to the panels.
- Use a permeable paint finish to redecorate.
Applying insulated lime plaster
Such an internal finish might be especially suitable in vernacular buildings and service areas where plaster on the hard is common.
- Remove all existing finishes entirely.
- Batch up the insulated lime plaster.
- Apply two layers until the desired thickness is achieved, waiting for each layer to dry thoroughly before applying the next.
- Use limewash or distemper for the final decoration.
To achieve reasonable thermal improvement, 50–80mm of the insulated lime plaster is required.
- Previous
-
Applying insulation onto lath and plaster walls
- Next
-
Holding insulation in place with framing
Holding insulation in place with framing
Holding insulation in place with framing
Where original lath and plaster wall linings are damaged or have been removed, there may be space to fit new timber strapping or framing. This can then be used to hold a thicker, board-based insulation material.
Using timber framing to hold insulation is a fairly well established method in construction. So a wide choice of suitable vapour permeable insulation materials is available, with the option of rigid boards or more flexible batts.
Insulating materials that may suit include:
- aerogel board
- wood fibreboard
- hemp board
- board made from recycled textiles
The thermal improvement achieved will vary according to the type and thickness of the material used.
Fitting framed insulation
- Fix vertical timber studs to the wall to create the framing.
- Place your chosen insulation material within the framing.
- Close in the insulation material behind clay board or plasterboard.
- Use a permeable paint finish to redecorate.
How deep the frame is will depend on the thickness of the insulation material to be used. Consider this in relation to room features and available space.
Note that some proprietary systems such as aerogel board use a metal frame.
- Previous
-
Applying insulation onto internal masonry
- Next
-
External wall insulation
External wall insulation
External wall insulation
External wall insulation may be suitable for a harled or rendered building if the finish is failing. This may be especially beneficial if replacing an impermeable cement-based render with a permeable material, as this will improve moisture handling.
External wall insulation is expensive to install, however, and may only be effective where relatively large areas are treated.
Suitable materials for external wall insulation may include:
- wood fibre board – this is moisture vapour permeable
- other conventional external insulation – so long as it’s moisture vapour permeable
- lime based insulated render
Boards or spray-applied materials that don’t allow a degree of moisture movement must not be used. These could result in a build up of moisture in the fabric of the wall.
You must get a building warrant to apply insulation to an external wall.
This option is unlikely to suit many traditional buildings, as applying insulating material to the external face of masonry would obscure high quality ashlar work or an attractive façade. It can also be difficult to detail external wall insulation, e.g. at window and door openings. But it may be suitable for use on gable ends or plain rear elevations.
Fitting wood fibreboard external insulation
For external wall insulation, a board and render system such as the wood fibre board may be appropriate if it allows the vapour permeability of the wall to be maintained.
- Apply wood fibre board, typically 40mm in thickness, to the walls.
- Protect the boards from direct moisture.
- Finish by adding special edge and drip detailing to keep wind driven rain away from the board.
- It's best to apply (a vapour permeable) render over board-based external insulation to make it fully weatherproof.
- Previous
-
Holding insulation in place with framing
Related to How to insulate stone walls

Hiring a contractor
Get advice on hiring a contractor including choosing a contractor and managing the work.


